Simple Soap Saving Hack

Does your family waste SO much liquid soap at the bathroom or kitchen sink? I know mine sure does. Here is a quick, easy, and CHEAP tip to save soap (and money) big time! | This post contains affiliate links |

Soap Saving Hack - Cheap, Easy, Great for Kids

The cover photo for this post shows the bottle of soap “before” - but I’m going to show you a quick and easy way to modify the pump so that it uses less soap with every pump! To do this you only need 3 simple items you probably have on-hand already.

Simple Soap Saving Hack

Materials

  • Liquid Soap - you can use any liquid soap pump (even refillable ones) but personally we love Mrs. Meyer's handsoap (usually we use Oat Blossom but we're still using up one of the holiday scents here)
  • Small Zip Ties (we used black here because the pump is black, but you could use white or another color zip tie if it matches better)
  • Scissors

How To

Seriously this couldn’t be much easier!

Simply put the zip tie around the soap pump where it goes down, tighten (but not too tight), and then trim off the extra. Ta-da, it’s done!

This “ring” made by the zip tie will prevent the pump from going down all the way. This way you get like a “half-pump” of soap rather than a whole pump (personally I feel like a whole pump tends to dispense far too much soap).

Now it dispenses far less soap = less waste!

Simple Soap Saving Hack

Once the zip tie has been trimmed it’s barely noticeable. This little hack has saved SO much soap in our family - I really notice us going through the hand soap much slower. I hope this little trick will save you soap and money too!

PS - if you buy the same brand soap over and over you can reuse the pump top from bottle to bottle so you can keep reusing the same zip tie modified top if you don’t want to keep using up zip ties.

Disclaimer: Use at own risk.

KEEP UP WITH BIRCH LANDING HOME
|  Etsy  |  Facebook  |  Instagram  |  Pinterest  |  Bloglovin'  |  Hometalk  |

Comment
Share

Affordable Yankee Swap / White Elephant Gift Ideas

‘Tis the season of Yankee Swaps! (Being from New England, we call them Yankee Swaps but most parts of the USA call them White Elephant Gift Exchanges.) Yankee Swaps are always a fun time and joke gifts usually rein. That said, it can be hard to decide what to bring as your gift so here are a variety of affordable gift ideas, ranging from funny to nice to extra cheap/free, all broken down into categories for easy shopping (I will keep adding to this list as I think of more). | This post contains affiliate links |

Yankee Swap / White Elephant Gift Ideas; Practical, Funny, Cheap, and more ideas!

The first thing to consider before you choose your gift is your audience… is this a professional work party? Then you might not want to bring the toilet coffee mug.. however if the party goers have a sense of humor then silly gifts may win the night! Also consider if there’s an inside joke you can play up - for example one year at our work party someone wrapped and gave the dead houseplant that had been sitting in the breakroom for months! Now that was a clever and funny gift idea.

Funny and Silly (Joke) Gift Ideas

  • Framed photo of yourself - preferrably in the dramatic, cheesy department store photoshoot style
  • Burrito Blanket - Not going to lie, I kind of want one of these! haha
  • Toliet Mug (with an extra surprise)
  • Bean Boozled Game - This is a funny game: spin the spinner, take a jelly bean... is that yellow speckled jelly bean buttered popcorn flavored or ear wax flavored? You won't know until you try it!
  • Scratch Off Dad Jokes - everybody loves a corny Dad joke!
  • A Rotisserie Chicken (and a side) - this one is so unexpected it's bound to get a laugh. Just make sure you buy it right before the party and maybe put it on ice packs so it doesn't go bad.

Practical and Nice Gift Ideas

  • Lottery tickets/Scratch off tickets - everyone dreams of winning big!
  • A Cozy Blanket
  • Food basket - come up with a theme and include nice snacks or drinks
  • Nice office supplies (a nice set of stationery, pens, etc)
  • A board game or card game
  • A Gift Card to a Local Shop or Restaurant

Cheap or Free Gift Ideas

  • Something from around your house that you’re not using - coffee mug, knick knack, etc.
  • Something half used from your house - like a candle.
  • Split and repot one of your houseplants to share
  • A Big Package of Toliet Paper or Tissues - People often get excited for these before opening because it looks like a big gift!

KEEP UP WITH BIRCH LANDING HOME
|  Etsy  |  Facebook  |  Instagram  |  Pinterest  |  Bloglovin'  |  Hometalk  |

Comment
Share

SALE: 20% Off EVERYTHING in Etsy Shop!

Happy Plaid Friday/Small Business Saturday/Cyber Monday! (Whew, what a mouthful) To celebrate we’re offering 20% off everything in our Etsy Shop with no minimums - including some really unique Vintage Christmas items, as well as our classic Stickers, New England Lakeside Hats, and Hand-Etched Ornaments. Shop now before the sale ends!

And please don’t forget to Shop Local this weekend (and always!) - small shops need your support more than ever. This year we had four brick and mortar shops that we wholesale to close their doors… it’s a ripple effect that goes beyond that one business and impacts all the other small businesses (like mine) that they carry as well. Please support our local Stockists (tell them I sent ya), and all other local shops when you can.

KEEP UP WITH BIRCH LANDING HOME
|  Etsy  |  Facebook  |  Instagram  |  Pinterest  |  Bloglovin'  |  Hometalk  |

Comment
Share

SIMPLE Disney World Planning Tips & Tricks for First Timers

This past October we went on our first trip to Disney World as a family and it was amazing! We’ve been putting it off for awhile because we wanted the kids to be bigger and, to be honest, it sounded just absolutely overwhelming to plan everything! After reading many other blogs and following some forums online we were so nervous to take the leap and go but we did it and we’re so glad we did. We luckily had a smooth trip and we are so thankful for such a fun and relaxing week as a family. Here I thought I’d share some of the tips and tricks we learned along the way while planning it all ourselves - without making it overly complicated. | This post contains affiliate links |

SIMPLE Disney World Planning Tips & Tricks for First Timers; image of Disney Castle

Disclaimer: This post shares tips based on our experiences - please do your own research regarding what will work best for you and/or your family and realize that things may be subject to change.

To Use a Disney Planner or Not?
(We Booked Ourselves)

First thing to consider is whether to use a Disney Planner or not… ultimately we did not use a planner because we’re very cautious people and giving a stranger all our info and letting them plan our itinerary just made us nervous. That said, tons of people use Disney Planners all the time and have great success - it doesn’t cost you anything (they get a kickback from helping you book) and it can take a lot of the stress away from planning. Most people find a Disney Planner by word of mouth — However we planned everything on our own.

When to Go?

Deciding when to go is the next step. It’s a good idea to consider both how old you want your kids to be as well as time of year. For us we wanted our kids old enough to do most of the rides and walk the whole time (we did not want to deal with a stroller - but that’s our personal preference). And you also want to consider time of year… summertime can be brutally hot, hurricane season can have weather impacts, holidays can be insanely busy, and popular school vacation weeks can be very busy as well. (Ultimately Disney is always busy but if you want to mitigate that some try to pick a less-busy time.)

Picking Hotels (& Booking Flights)

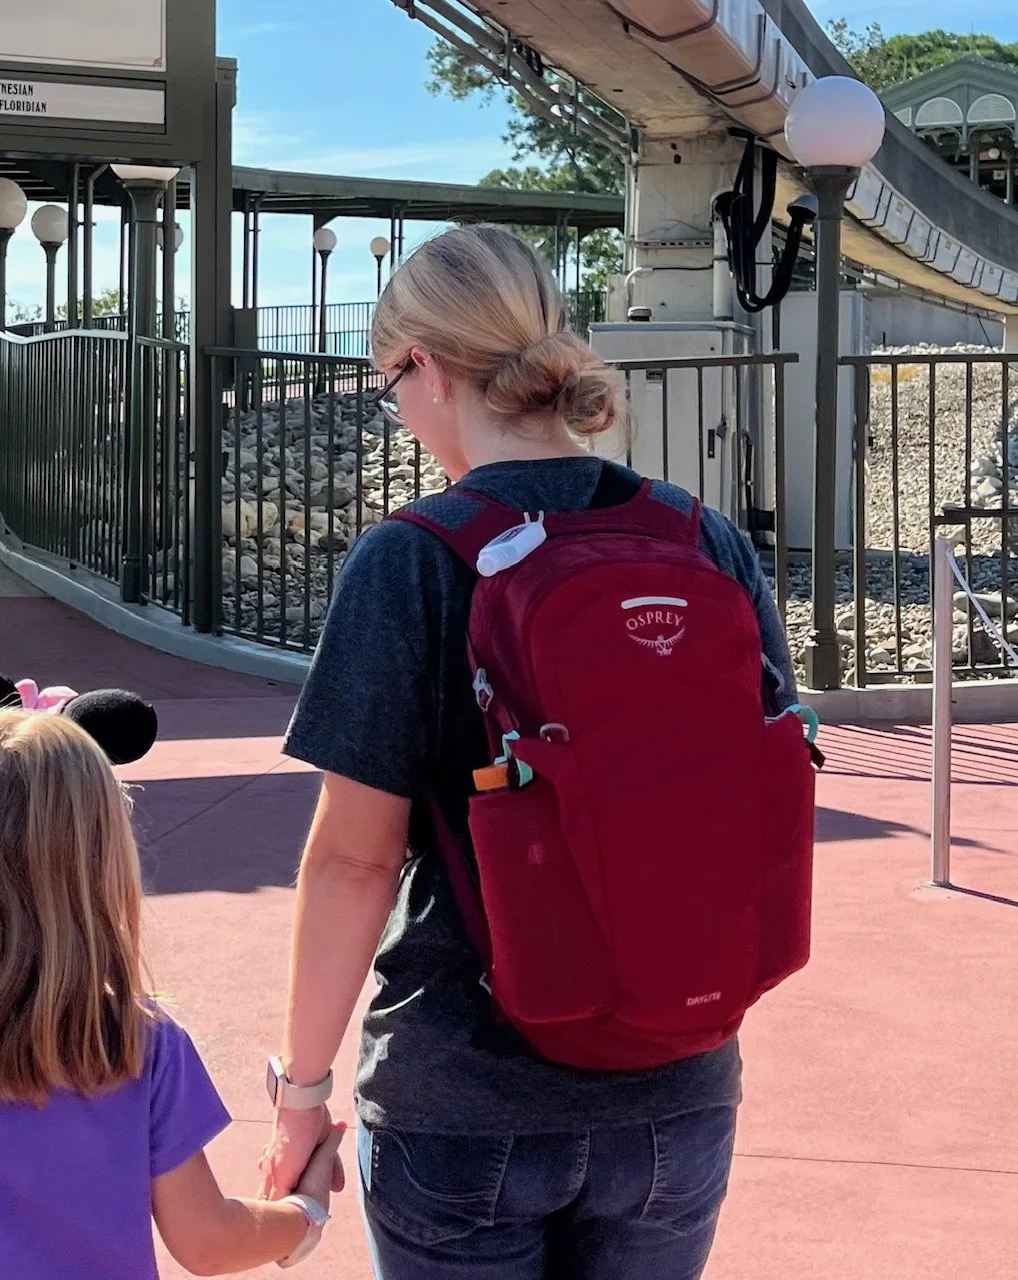
Many people choose to stay “off property” at an Air BnB because it can be cheaper, but staying on Disney property was very important to us. We wanted all the perks we could get and if you stay on Disney property you get things like free transportation to and from the parks from your hotel, early entry times for the parks, earlier availability to book Lightning Lanes, and more.

We checked the Disney World website periodically to see what was available for hotels and rates for the week we wanted to go. One thing we noticed was prices and availability changed A LOT, so it’s worth checking often and being patient until you see something that works for you and then jump on it! Once we saw a hotel/parks pass package available for the hotel we wanted (we stayed at one of the value resorts) and week we wanted we quickly looked at flight availability. For us we wanted a direct flight from our local airport and we lucked out with flight availability lining up with the hotel stay and we booked everything at once. We also opted for the travel insurance through Disney just in case plans had to change (this does not cover your flights though, FYI).

To Park Hop or Not?

One option for ticket packages includes Park Hopper Tickets (which usually cost more) - this allows you to visit more than one park per day, otherwise without Park Hopper once you scan into a park you can only visit that particular park for the rest of the day (you can come and go, but only to that one park for that day).

For us we did not get Park Hopper, and it worked out great - it was cheaper and our I don’t think our kids would have had the patience to add the hassle of transporting to another park in the middle of the day. For our trip we had 5 full park days and it was easier to focus on one park per day, with the last day as a make-up day for whatever park we wanted to spend additional time in (we went to Magic Kingdom).

Book Airport Transportation

Next consider transportation from the airport to your hotel (or Air BnB) and back to the airport at the end of your stay. Some people choose to rent a car for the length of the stay. Other options include hiring an Uber or other rideshare, booking a MinnieVan, or MEARS (a bus service). We opted for MEARS and it worked out great. If using something other than Uber or another on-demand rideshare service, I would recommend booking your transportation early. (If you need car seats make sure to coordinate that too with your transportation company.)

Disney Gift Cards

There are some stores (like Sam's Club) that sell Disney gift cards at a discount... the offers can vary but you can typically get Disney Gift Cards for less than their face value. Also if you have a Target Credit Card you typically get 5% off Disney Gift Cards at Target.. so in that case a $500 gift card could only cost you $475!

Some people will pay for their whole trip this way… buying a few Disney gift cards here and there when they can over the course of weeks/months. The savings can definitely add up but we were wary of locking all our money into gift cards - especially in the event if the trip needed to be cancelled or rescheduled. So instead we got a few gift cards to have as spending money while we were there for food and souvenirs. Some family members also got our kids a Disney gift card so they could have their own spending money which was very thoughtful. (*Note: If you do use physical Disney Gift Cards make sure to save the Gift Card even if it’s spent until your trip is done… I’ve heard stories about people cancelling their trip or an aspect of their trip or making a return and the funds automatically go back on the gift card.. if you don’t have the physical gift card or a record of it’s information then it can be very difficult to use those funds again.

Buy Some Souvenirs BEFORE You Go

To put it bluntly, souvenirs inside the parks can be PRICEY. In order to save money, buy some souvenirs ahead of time, especially for your kids. Some examples would be things like ear headbands, stuffed animals, shirts, or bubble wands (if you do checked luggage).

Carry-Ons Only

I know it’s not for everyone but we’re a carry-on only family - we just don’t like dealing with checking bags and collecting them afterwards and the stress and time involved with that. Because of that, we packed everything we needed in a small duffle bag each - for that we love our L.L. Bean Duffle Bags for carry-ons. We still made sure to put luggage tags on everything too on the off-chance we had to gate-check our bags when we boarded the plane.

Every family member carried their own clothes, tolietries, etc - and each of us even had an extra pair of shoes in our bags! For tolietries I could not get in travel sizes (like particular sunscreen and shampoo for our little one with very senstive skin), I used TSA-approved travel bottles (similar ones linked) to bring our own from home. (I even labled the bottles with a label maker because the sunscreen and shampoo looked the same in the bottles.)

Pack an Extra Bag of Snacks/Food

We also brought one extra small backpack (it was my husband’s “personal item” at check in) that we STUFFED full of snacks, granola bars, and two empty Nalgene water bottles (which we also stuffed with granola bars to save room). While you can get grocery delivery at Disney hotels, we wanted to avoid it if possible (one less thing to deal with and one less expense because Disney hotels charge a small fee for grocery delivery). Double check with your airline that there’s no issue bringing a backpack of snacks, but we had no issue with ours - we also made sure it didn’t have any liquids and all the food was factory sealed. Once we got to our hotel room we took all the snacks out and the backpack became our “park bag” for the trip - and then became our souvenir bag for the trip home (since by then we had eaten all the snacks.)

Pack Ziplock Bags

Definitely pack some ziplock bags from home, in a variety of sizes. They come in handy much more than you would think! They’re great for protecting souvenirs or books you buy, keeping some snacks for later that your kids didn’t want to finish, organizing your park bag, packing wet or dirty items for the trip home, etc. - the possibilities are just about endless.

Pack Cooling Towels

One random item we were thankful to have packed in our park bag were cooling towels. These are thin special towels that you get wet, ring out, and then can drape around your shoulders/arms or on the back of your neck. They really help cool you down when it’s hot! Even though we went to Disney at the end of of October it was still quite hot during the day, and I swear some parks (like Epcot) were extra hot because of the lack of shade. The cooling towels were a lifesaver for keeping our kids comfortable in the heat.

Have a “Park Bag”

SIMPLE Disney World Planning Tips & Tricks; Park Bag

Having a small backpack to bring around in the parks is a must. Cute Loungefly bags are very popular at Disney, but I personally don’t think they’re very practical. For us we found the Osprey Daylite pack to fit the bill perfectly - it was big enough to carry snacks, disposable ponchos, our refillable Nalgene water bottles, cooling towels, and still have enough room to fit small souvenirs or some thin sweatshirts. It’s also small enough to be able to bring on most of the rides - including roller coasters. Also the Osprey Daylite carries the weight SO well - even full of souvenirs and two full Nalgene water bottles you barely know it's there. An amazing added feature is you can use the cinch buckles on the sides to thread through the Nalgene water bottle loops to keep them extra secure. My husband carried the bag most of the time but we all took turns with it occasionally.

SIMPLE Disney World Planning Tips & Tricks; Lululemon Belt Bag

I also carried a Lululemon Belt Bag on me at all times that was perfect for carrying my phone, wallet, anti-friction balm (to help prevent blisters), and hand sanitizer.

(PS - if you're looking for a fun but simple Disney-themed bag, Lululemon also has this really cute Mickey Outline Belt Bag that I totally would have worn!)

And don’t forget to make sure your Park Bag is packed and ready each night to make the mornings quicker and easier - especially if you’re Rope Dropping!

AirTag Your Kids & Strollers

You may want to consider AirTagging your kids, especially if you’re concerned about the possibility of getting separated from them in the airport or parks. We used bracelets to hold our kids’ AirTags (they wore an AirTag on one wrist and their Magic Band on the other). It was also super helpful in finding each other when we did split up… sometimes I would take one kid to the bathroom or to get food at one food stall, and my husband would take our other kid in the opposite direction to a different food stall. By using the AirTags we could easily find each other to meet back up afterwards.

If you have a stroller (we did not), it’s highly recommended to AirTag them. Cast Members constantly shuffle and move strollers around in stroller parking areas to make room for more strollers, a parade coming through, etc. And while it’s unlikely, rarely strollers do get stolen too… so definitely AirTag them to keep track.

Park Gift Shop Tip

When you're in Gift Shops in the Parks always check if the item you’re interested in is available elsewhere - like The Disney Store Online or Target. Unfortunately most items in the Park Gift Shops are “Park Exclusives” and unable to get elsewhere, but at least several of the things we looked at were available other places - sometimes slightly cheaper too. And even if it’s the same price online, if you’re able to buy it from home it will save you that much more room in your luggage ;)

Be Kind to your Feet

You will walk a lot in Disney - a LOT. We averaged close to 10 miles a day!

Thankfully we’re in pretty good shape, our kids are big enough to walk and keep up, and we all wore good footwear - so we had no issues. That being said, make sure you’re prepared for the amount of walking you will do. If you need to, start taking progressively longer walks weeks or months in advance to help train up for it. Definitely pack a comfortable pair of broken in sneakers as your main walking shoes, plus another comfortable pair of shoes as a back up in case your sneakers get wet or your feet need a break from your regular shoes one day. Many people recommend “crocs with socks” though I brought Oofos - but please pack whatever suits you best. Other things that you may want to consider packing are anti-friction balm, blister bandages, compression socks if needed, and epsom salt lotion (it feels so nice after a long day on your feet!).

Paying Extra for Lightning Lanes (LL) is Worth It

Initially I was totally against Lightning Lanes (LL)… Me: “No way are we paying extra money towards rides.. this trip is expensive enough!”. However, my husband insisted we get them and I’m so glad he did because without them there was no way we could have fit in half of what we did otherwise. With LL we luckily were able to fit in EVERYTHING we wanted to do and more. We found the trick to be to schedule your first Lightning Lane Multi Pass (LLMP) as early as possible in the day (even if it’s on a “throw away” ride that usually doesn’t have a long line) and then keep stacking and modifying your selections as you check into rides.. you can have a total of 3 rides booked ahead at a time with LLMP. Sometimes it kept us running from one side of the park to the other because we had to work around what was available and when, but we were able to fit SO much more in.

We also booked Lightning Lane Single Pass (LLSP) for the new/popular rides those were available for, like TRON and Guardians of the Galaxy Cosmic Rewind. With all LLs you check into the LL line at your scheduled time and you’re able to get right on the ride with no wait or a very short wait… on the other hand we saw regular wait times for rides typically range from anywhere from 5 minutes to 240 minutes (that’s FOUR HOURS!), with the average being probably between 20-55 minutes… still that’s a long time to wait in line, especially if most rides have a wait like that you would end up spending most of your day standing in line. Also, I don’t think our kids would have had as much fun or as much patience if we were in lines all day, every day of our trip.

Use Apple Watches Instead of Magic Bands for Adults

If you already have an Apple Watch you can link your tickets to your watch and use that to scan in at the gate for park entry, Lightning Lanes, and for PhotoPass pictures and skip buying a Magic Band. The one thing it can’t do is unlock your hotel room door… which we learned the hard way one night when we locked ourselves out of our room after using the pool. Oops. (Don't worry though - you can get a key card to keep in your wallet for the door.)

Get a “Security Band” if You Use Magic Bands (for Kids and Adults)

SIMPLE Disney World Planning Tips & Tricks; Security Bands for Magic Bands

It is possible to do Disney without Magic Bands (you can get key cards at your hotel that can be used for ticketing, Lightning Lanes, hotel key, etc), but having everyone in your party either have a Magic Band or an equivalent (like a linked Apple Watch) will make everything go a lot smoother and quicker - especially at park entry and Lightning Lanes. For those with Magic Bands, using a "security band" like these on them is a MUST. Magic Bands just do not stay on well at all, and if you don’t want to loose it on your trip you must secure it and these worked perfectly for us!
(My husband and I even added the security bands to our Apple Watches for extra peace of mind.)

Don’t Stress About Dinner Reservations

Unless you’ve got your heart set on dining at a very specific, hard-to-get restaurant (like Ohana’s, Tusker House, or Cinderella’s Royal Table), don’t stress about making reservations early. For us we waited and made reservations at several sit-down restaurants (including Character Meals) about a week before we went and had no problems making reservations for the days we wanted, though the time choices were somewhat limited. However, once it was the day-of we were able to modify the reservations and choose from lots of time slots to better suit how our day was going (either move the reservation up earlier or back later).
**Definitely check ahead of time though what the cancellation/modification policy is of the restaurant you’re eating at because some will not let you change it within a certain amount of time of the current reservation without a fee.

Buy Silhouette Frames When You Get Home and Save the Space in Your Suitcase

My single must-do/must-have souvenir from Disney was getting Silhouette Portraits done of our kids in Magic Kingdom. It was such a cool experience watching them work and cut a perfect likeness within minutes! I recommend getting them done mid-day if possible, as the line seems to be shorter. After the silhouettes are cut and it's time to pay you have the option to buy the frames there if you would like. I had every intention of buying oval frames there but at the time they were sold out of ovals and only had rectangular frames which I just wasn't interested in. So we got our silhouettes to-go in a little gift bag (tip: it would be a good idea to bring a large ziplock bag to protect the silhouettes a little more).

SIMPLE Disney World Planning Tips & Tricks; Silhouette Portrait Frames

When it came time to pack up and go home at the end of the week I was actually very thankful we didn't buy the frames in Disney - we travel with carry-ons only which were already stuffed to the brim with our regular items and all our other souvenirs. There would have been no room for frames.

Once we got home I shopped around online to find oval frames that fit the silhouettes. After reading a lot of mixed reviews I ordered several different frames to find the one that fit best. After some trial and error I found the PERFECT FIT oval frames for the Disney World Silhouettes right on Amazon - and they come as a set of two! It was meant to be ;)

Do Early Entry and Rope Drop the 2nd Most Popular Ride

By staying on-property we were able to do Early Entry at the parks - this is when guests staying at Disney resorts are allowed in approximately 30 minutes earlier than normal entry. It doesn’t sound like much of an edge, but it’s a huge advantage - especially if you get in line at the gate early and you’re among the first people in. Being in early lets you take photos and enjoy the scenery without as much crowds as later in the day - this is especially noticeable at Magic Kingdom.

You can also “rope drop” a ride this way - which means you get to the ride entrance before they “drop the rope” for that section of the park and start letting people queue up for the ride(s) in that section. (Keep in mind not all rides are available during early entry, but some will be open and some you can start lining up early for - you can check the list of what’s going to be available for Early Entry on the Disney website.) We found that the most popular rides were still crazy-busy and would quickly develop insanely long lines at rope drop, but the not-as popular rides would be walk-on. Therefore we we would make sure to schedule our LLs for the most popular rides and try to rope drop the second-most popular rides. For example, on the day we went to Animal Kingdom, Avatar Flight of Passage had an insanely long line at rope drop but Avatar Nav’i River Journey was walk-on - in fact we rode it twice in a row with no wait!

Eat One Meal a Day from Packed Food to Save Money

To help save money on food costs eating out in the parks, we typically ate breakfast in our hotel room before we left for the parks for the day. We had planned on doing that anyways to help save money, but since we would leave so early for Early Entry nothing was open yet for breakfast anyways so it ended up being a necessity. In our carry-on bags we had one backpack full of granola bars, breakfast tarts, dried fruit, etc. and it was perfect for a quick breakfast before heading to the buses or Skyliner to get to the parks.

Get Free Water in The Parks

Another way to save money is to bring refillable water bottles and ask for free water at any of the quick service food stalls. They will give you cups of ice water than you can pour in your refillable bottle (they’re not allowed to fill your bottles for you for sanitation reasons). There are also some water refill stations at places around the parks, they’re often near a bathroom but not all bathrooms have them.

A lot of people will complain about the taste of the water, but we didn’t mind it. We did bring Gatorade packets just in case (for flavor and for hydration purposes), but I think we only used them once or twice.

You Can Get a Doctor “House Call” to Your Hotel Room, If Needed (Though I Hope You Won’t Need It)

During our trip our oldest daughter unfortunately had an awful cold (she had tested negative for Covid/Flu prior to leaving). One night it seemed to peak and we were questioning if it could have developed into pneumonia… we wanted to get her checked ASAP but it was the middle of the night and the local Urgent Cares were closed and we had no transportation. I called the front desk and the hotel could have provided transportation to the local Emergency Room or they could connect me with a third party company that provides “house call” doctor visits in your hotel room.

We opted for doing a house call since it wasn’t a true emergency and we wanted as little disruption as possible for our kids. The front desk connected me with the company and I provided patient information, her symptoms, and payment (they do not take insurance - you must pay up front but you can try to submit to your insurance later for reimbursement). Within an hour a doctor was knocking on the door - he was very nice, professional, and came with a large rolling bag with equipment in it. He took patient history then checked her nose, ears, throat, and eyes, listened to her lungs, and took her O2 reading, pulse, and temperature. Thankfully everything checked out fine - she did not have pneumonia, it was just the peak of her viral cold and she was all set.

When he left he provided us with a superbill that we could submit to our insurance to try to get reimbursed. Unfortunately for us he was not in network for our insurance which was a bummer so we were unable to get reimbursed (though a portion of the bill did go towards our out-of-network deductible so at least that was something). Nevertheless, it was well worth it for peace of mind and convenience - it was still cheaper than an ER visit and a lot less disruptive.

Most Importantly: Be Flexible and BE NICE

The most important tip of all, in my opinion? Be flexible (set low expectations) and be nice. Seriously.

If you go into your trip expecting nothing but magic and pixie dust and doing every single thing you want you’re probably going to set yourself up for disappointment. Rides go down.. a lot. Character lines can be long and close for breaks. Your kids may be pooped out and want to go back to the hotel at 1PM. One reservation may take longer than expected and cause you to miss another reservation. So be willing to compromise, go with the flow, and be flexible. If you set low expectations on how much you will be able to do, you will automatically win when you exceed those (low) expectations.

And above all - be nice, please. For the most part all the guests we met were very nice but we also came across some doozys who were exceptionally rude to Cast Members or even their own kids. Please have patience with everyone and you’ll have a much better time.


I hope these tips based on our experiences will help you! Definitely do your research and be flexible and I’m sure you’ll have a wonderful trip!

Disclaimer: This post shares tips based on our experiences - please do your own research regarding what will work best for you and/or your family and realize that things may be subject to change.


KEEP UP WITH BIRCH LANDING HOME
|  Etsy  |  Facebook  |  Instagram  |  Pinterest  |  Bloglovin'  |  Hometalk  |

PERFECT FIT Oval Frames for Disney World Silhouettes - on Amazon!

We recently came back from the most amazing and magical trip to Disney World! It was our family’s first trip and we had such a wonderful time and learned so much along the way (separate blog post coming soon to share more on all that we learned). One of my top must-dos for the trip was to get a silhouette portrait of our girls done as a souvenir. | This post contains affiliate links |

PERFECT FIT Oval Frames for Disney World Silhouettes - on Amazon!; What frame fits Disney Silhouette Portrait

At the time of writing this post, they currently have Silhouette Artists at Magic Kingdom and at Disney Springs. We tried twice at Magic Kingdom to get them done but the first time we went was towards the end of the day and the line was long and our kids were tuckered out so we had to skip that day. The second time we went to Magic Kingdom during the middle of the day and it was a success - a short line that moved fast and it was so amazing to watch the Silhouette Artist work! The subject sits in a chair across from the artist (many artists can also work from a side view picture if it’s a good one - they can even do pet portraits this way), and then they get to work snipping the paper with sharp little scissors. They cut two sheets of paper at once and you end up with two sets of portraits (mirror imaged). The artist did both our kids within minutes and it’s a perfect likeness to them, I was so impressed!

Afterwards when it's time to pay you have the option to buy the frames there if you would like. I had every intention of buying oval frames there but at the time they were sold out of ovals and only had rectangular frames which I just wasn't interested in. So we got our silhouettes to-go in a little gift bag (tip: it would be a good idea to bring a large ziplock bag to protect the silhouettes a little more).

When it came time to pack up and go home at the end of the week I was actually very thankful we didn't buy the frames in Disney - we traveled with carry-ons only and there was no way we would have had room for the frames in our carry-ons.

| Oval Frames that fit Disney World Silhouettes (they also come in other colors too!) |

Once we got home I shopped around online to find oval frames that fit the silhouettes. After reading a lot of mixed reviews I ordered several different frames to find the one that fit best. After some trial and error I found the PERFECT FIT oval frames for the Disney World Silhouettes right on Amazon - and they come as a set of two! It was meant to be ;)

I recommend taking out the plexiglass piece and using that as a guide to trace and cut out your silhouette to fit in the frame (I did not use the oval mat that came with the frame - and don’t forget to remove the protective plastic film from both sides of the plexiglass). It worked perfectly for us! We kept one portrait for ourselves and gave the other one to the grandparents as a thank you for house sitting for us. It’s such a special souvenir that we’ll treasure!

Disclaimer: I found that these frames fit the Silhouettes we got this year (Fall, 2024) at Disney World perfectly. I would think they should also fit the Silhouettes from Disneyland and Disney Springs too, but I cannot confirm that because I haven’t tried it yet myself.


KEEP UP WITH BIRCH LANDING HOME
|  Etsy  |  Facebook  |  Instagram  |  Pinterest  |  Bloglovin'  |  Hometalk  |

A List of Educator (Teacher and Staff) Discounts - Happy New School Year!

I’ve been working in the school system for a few years now - while I did have a teaching degree at one time (I let it lapse), I’ve been working in a support staff role. Being a school staff member doesn’t pay much so getting discounts at different retailers is a small but appreciated perk of the job. I’ve complied a list of some of the stores and restaurants that give Educator/Teacher/School Staff Discounts. Also if you homeschool some places will honor that and give you a homeschool educator discount too so it’s always worth asking! | This post contains affiliate links |

A List of Educator (Teacher and Staff) Discounts; image of shopping bags

Disclaimer: Different stores have different offers and rules - and they’re subject to change. Make sure to double check on discounts and read the fine print and before you use them. Some of these discounts are in person and others you can do online with verification. If I’m shopping in-store I always ask if they offer an educator discount - you’d be surprised how many random places do!

A Quick List of Some Educator Discounts:

  • Many local museums - Always ask when going to a local museum if they offer an Educator Discount - many do for admission or at least for the gift shop

  • Some local restaurants/coffee shops - You may find a local restaurant or coffee shop may offer an educator discount on a particular item (like coffee) or your whole meal - it’s always worth asking!

  • L.L. Bean - 10% off (online or retail stores - does not work at L.L. Bean Outlets)

  • Target - varying offers throughout the year with special coupons/discounts

  • JoAnn Fabrics - 15% off

  • Michael’s - 15% off

  • J.Crew - 15% off

  • Under Armour - 20% off

  • Crocs - 15% off (full-priced items only)

  • Loft - 15% off (full-priced items only)

  • New Balance - 25% off

  • Sunglass Hut - 15% off

  • Canva - may be free if you sign up for an educator account with your school email (not all schools are eligible)

What other places give you a teacher/educator discount? Let me know!

Disclaimer: Different stores have different offers and rules - and they’re subject to change. Make sure to double check on the discounts and read the fine print and before you use them.

KEEP UP WITH BIRCH LANDING HOME
|  Etsy  |  Facebook  |  Instagram  |  Pinterest  |  Bloglovin'  |  Hometalk  |

FREE National Parks Pass for All 4th Graders and their Families - "Every Kid Outdoors"

Did you know every 4th Grader can get a FREE National Parks Pass? I found out about the program when our not-so-little one went into the 4th Grade and we were able to take advantage of it. Signing up is incredibly easy through the “Every Kid Outdoors” Website - once you’re signed up make sure to bring your printed confirmation with you and your 4th grader to a National Park and the ranger there will finish the sign up process and give you National Parks Pass that’s good for the whole year (Sept 1st-Aug 31st of the school year your child is in 4th grade). If you’re a homeschool family this program also works if your child is homeschooled and in the equivalent of 4th grade.

FREE National Parks Pass for 4th Grade Families - "Every Kid Outdoors"; image of kid holding National Parks Pass

We personally used it to go to Acadia National Park (our favorite place) in Maine and Saint-Gaudens National Park in New Hampshire. Maybe when our next child is in 4th grade we’ll get a little more adventurous and get to a National Park out west.

If you're planning on checking out several National Parks during the year, you might want to pick up a National Park Journal (affiliate link) so your kids can document the journey and adventures! Happy Exploring!

Note: This is not a sponsored post, I’m just sharing my experience with this program when we did it. Please see Every Kid Outdoors’ website for details as they may change.

KEEP UP WITH BIRCH LANDING HOME
|  Etsy  |  Facebook  |  Instagram  |  Pinterest  |  Bloglovin'  |  Hometalk  |

Comment
Share

Tips for Selling on Facebook Marketplace

Lately I’ve been on a huge decluttering kick. I really want to pare down what we have in our home so we only have stuff we love, use, or is sentimental/important to us. Everything else can go. I’ve been taking my time with this process but it’s been really freeing to open up some space in our home. I try to throw away as little as possible and have been either donating items locally or selling them on Facebook Marketplace. Read on for my tips on how to sell your unwanted items on Facebook.
| Disclaimer: These are suggestions. Sell/buy on Facebook at your own risk. |

| Disclaimer: These are suggestions. Sell/buy on Facebook at your own risk. |

Tips for Selling on Facebook Marketplace

Clean Your Items Before Taking Photograpshs

Oh my gosh - this is the most obvious one that I feel like so many people neglect to do. They will post a picture of a table for example, still covered with magazines and cups - or the table will be filthy with dust. Kids’ shoes is another big example - make sure to take a little time and clean kids’ shoes. Get any stains/dirt you can off up the uppers and take an old toothbrush and clean the mud out of the treads. No one is interested in your dirty items - clean them up!

Consider the Backdrop of Your Photos

Don’t take photos somewhere messy or that looks unclean (like a basement or garage - unless you’re selling something that really belongs there like sports equipment or tools). For example, if you’re selling a nice piece of furniture, dress, kids’ toys, etc make sure the backdrop is somewhere clean and nice inside your home - don’t take a sketchy looking photo in a dirty/damp-looking basement because that implies the items weren’t well-cared for.

Price Your Items Well

Keep in mind this is a “yard sale.” And while things are typically priced a little higher than they would be at an actual yard sale, don’t be unreasonable. I usually price my items at the higher-end of reasonable, and then decrease my price periodically. If it doesn’t sell in a few weeks, it typically gets donated.

Be Safe

Be really wary with selling/buying on Facebook. Always check out the profile of who’s interested in the item to make sure it looks like it’s a real account with some history (it wasn’t just made in the last few months). Also never give out your phone number.. a lot of scammers will send you a message that says something like “I’m working, what’s your phone number so I can text you about this item? -or- Here’s my number, please text me.” Always decline to give out your number and say you only do correspondence through Facebook Messenger. It’s also a good idea to never accept electronic payments (Venmo, PayPal, etc) - stick to cash-only. (And if you’re a buyer never send an electronic payment as a “deposit to hold an item” - that’s a very common scam and a big red flag.)

And the biggest one - ALWAYS MEET IN A PUBLIC PLACE THAT ISN’T YOUR HOUSE. I strictly will only meet at local Police Department parking lots. Our surrounding town police departments all have designated parking spots under video surveillance that are meant for online sale exchanges. Several times someone has messaged me asking to meet for an item but instantly declined once they found out I only meet at the Police Station - that’s a huge red flag if they won’t meet at the Police Station and you want nothing to do with that person.. block them and move on.

Send a Reminder Message about an Hour Before the Meet

No-shows are the worst, and unfortunately fairly common. To help reduce no-shows, send a one-line reminder message about an hour before you’re supposed to meet the person.. something like “See you at XXX Police Department at 3PM.” Most of the time if they forgot or weren’t going to show up they will message you back and say “whoops, I won’t be there” and you’ll save yourself the trip. I also try really hard to line up my yard sale meets with other errands so I’m in that area anyways and it’s not as much of an inconvenience if I get stood up.

What Generally Sells Really Well:

  • Kids’ toys

  • Kids’ shoes & clothing (clothing typically sells better in big lots by size)

  • Sporting equipment

  • Tools

  • Furniture

  • Garden Items

I’ve found that some items in particular (like books and women’s clothing) do not generally sell well. Also make sure to try to sell items seasonally - don’t list snow pants for sale in April, they probably won’t sell. List them for sale in Fall when people are looking for them.

And always - make sure to follow Facebook guidelines on what is allowed for sale or not.

Good luck with your decluttering journey!

KEEP UP WITH BIRCH LANDING HOME
|  Etsy  |  Facebook  |  Instagram  |  Pinterest  |  Bloglovin'  |  Hometalk  |

Comment
Share