SIMPLE Disney World Planning Tips & Tricks for First Timers

This past October we went on our first trip to Disney World as a family and it was amazing! Weโ€™ve been putting it off for awhile because we wanted the kids to be bigger and, to be honest, it sounded just absolutely overwhelming to plan everything! After reading many other blogs and following some forums online we were so nervous to take the leap and go but we did it and weโ€™re so glad we did. We luckily had a smooth trip and we are so thankful for such a fun and relaxing week as a family. Here I thought Iโ€™d share some of the tips and tricks we learned along the way while planning it all ourselves - without making it overly complicated. | This post contains affiliate links |

SIMPLE Disney World Planning Tips & Tricks for First Timers; image of Disney Castle

Disclaimer: This post shares tips based on our experiences - please do your own research regarding what will work best for you and/or your family and realize that things may be subject to change.

To Use a Disney Planner or Not?
(We Booked Ourselves)

First thing to consider is whether to use a Disney Planner or notโ€ฆ ultimately we did not use a planner because weโ€™re very cautious people and giving a stranger all our info and letting them plan our itinerary just made us nervous. That said, tons of people use Disney Planners all the time and have great success - it doesnโ€™t cost you anything (they get a kickback from helping you book) and it can take a lot of the stress away from planning. Most people find a Disney Planner by word of mouth โ€” However we planned everything on our own.

When to Go?

Deciding when to go is the next step. Itโ€™s a good idea to consider both how old you want your kids to be as well as time of year. For us we wanted our kids old enough to do most of the rides and walk the whole time (we did not want to deal with a stroller - but thatโ€™s our personal preference). And you also want to consider time of yearโ€ฆ summertime can be brutally hot, hurricane season can have weather impacts, holidays can be insanely busy, and popular school vacation weeks can be very busy as well. (Ultimately Disney is always busy but if you want to mitigate that some try to pick a less-busy time.)

Picking Hotels (& Booking Flights)

Many people choose to stay โ€œoff propertyโ€ at an Air BnB because it can be cheaper, but staying on Disney property was very important to us. We wanted all the perks we could get and if you stay on Disney property you get things like free transportation to and from the parks from your hotel, early entry times for the parks, earlier availability to book Lightning Lanes, and more.

We checked the Disney World website periodically to see what was available for hotels and rates for the week we wanted to go. One thing we noticed was prices and availability changed A LOT, so itโ€™s worth checking often and being patient until you see something that works for you and then jump on it! Once we saw a hotel/parks pass package available for the hotel we wanted (we stayed at one of the value resorts) and week we wanted we quickly looked at flight availability. For us we wanted a direct flight from our local airport and we lucked out with flight availability lining up with the hotel stay and we booked everything at once. We also opted for the travel insurance through Disney just in case plans had to change (this does not cover your flights though, FYI).

To Park Hop or Not?

One option for ticket packages includes Park Hopper Tickets (which usually cost more) - this allows you to visit more than one park per day, otherwise without Park Hopper once you scan into a park you can only visit that particular park for the rest of the day (you can come and go, but only to that one park for that day).

For us we did not get Park Hopper, and it worked out great - it was cheaper and our I donโ€™t think our kids would have had the patience to add the hassle of transporting to another park in the middle of the day. For our trip we had 5 full park days and it was easier to focus on one park per day, with the last day as a make-up day for whatever park we wanted to spend additional time in (we went to Magic Kingdom).

Book Airport Transportation

Next consider transportation from the airport to your hotel (or Air BnB) and back to the airport at the end of your stay. Some people choose to rent a car for the length of the stay. Other options include hiring an Uber or other rideshare, booking a MinnieVan, or MEARS (a bus service). We opted for MEARS and it worked out great. If using something other than Uber or another on-demand rideshare service, I would recommend booking your transportation early. (If you need car seats make sure to coordinate that too with your transportation company.)

Disney Gift Cards

There are some stores (like Sam's Club) that sell Disney gift cards at a discount... the offers can vary but you can typically get Disney Gift Cards for less than their face value. Also if you have a Target Credit Card you typically get 5% off Disney Gift Cards at Target.. so in that case a $500 gift card could only cost you $475!

Some people will pay for their whole trip this wayโ€ฆ buying a few Disney gift cards here and there when they can over the course of weeks/months. The savings can definitely add up but we were wary of locking all our money into gift cards - especially in the event if the trip needed to be cancelled or rescheduled. So instead we got a few gift cards to have as spending money while we were there for food and souvenirs. Some family members also got our kids a Disney gift card so they could have their own spending money which was very thoughtful. (*Note: If you do use physical Disney Gift Cards make sure to save the Gift Card even if itโ€™s spent until your trip is doneโ€ฆ Iโ€™ve heard stories about people cancelling their trip or an aspect of their trip or making a return and the funds automatically go back on the gift card.. if you donโ€™t have the physical gift card or a record of itโ€™s information then it can be very difficult to use those funds again.

Buy Some Souvenirs BEFORE You Go

To put it bluntly, souvenirs inside the parks can be PRICEY. In order to save money, buy some souvenirs ahead of time, especially for your kids. Some examples would be things like ear headbands, stuffed animals, shirts, or bubble wands (if you do checked luggage).

Carry-Ons Only

I know itโ€™s not for everyone but weโ€™re a carry-on only family - we just donโ€™t like dealing with checking bags and collecting them afterwards and the stress and time involved with that. Because of that, we packed everything we needed in a small duffle bag each - for that we love our L.L. Bean Duffle Bags for carry-ons. We still made sure to put luggage tags on everything too on the off-chance we had to gate-check our bags when we boarded the plane.

Every family member carried their own clothes, tolietries, etc - and each of us even had an extra pair of shoes in our bags! For tolietries I could not get in travel sizes (like particular sunscreen and shampoo for our little one with very senstive skin), I used TSA-approved travel bottles (similar ones linked) to bring our own from home. (I even labled the bottles with a label maker because the sunscreen and shampoo looked the same in the bottles.)

Pack an Extra Bag of Snacks/Food

We also brought one extra small backpack (it was my husbandโ€™s โ€œpersonal itemโ€ at check in) that we STUFFED full of snacks, granola bars, and two empty Nalgene water bottles (which we also stuffed with granola bars to save room). While you can get grocery delivery at Disney hotels, we wanted to avoid it if possible (one less thing to deal with and one less expense because Disney hotels charge a small fee for grocery delivery). Double check with your airline that thereโ€™s no issue bringing a backpack of snacks, but we had no issue with ours - we also made sure it didnโ€™t have any liquids and all the food was factory sealed. Once we got to our hotel room we took all the snacks out and the backpack became our โ€œpark bagโ€ for the trip - and then became our souvenir bag for the trip home (since by then we had eaten all the snacks.)

Pack Ziplock Bags

Definitely pack some ziplock bags from home, in a variety of sizes. They come in handy much more than you would think! Theyโ€™re great for protecting souvenirs or books you buy, keeping some snacks for later that your kids didnโ€™t want to finish, organizing your park bag, packing wet or dirty items for the trip home, etc. - the possibilities are just about endless.

Pack Cooling Towels

One random item we were thankful to have packed in our park bag were cooling towels. These are thin special towels that you get wet, ring out, and then can drape around your shoulders/arms or on the back of your neck. They really help cool you down when itโ€™s hot! Even though we went to Disney at the end of of October it was still quite hot during the day, and I swear some parks (like Epcot) were extra hot because of the lack of shade. The cooling towels were a lifesaver for keeping our kids comfortable in the heat.

Have a โ€œPark Bagโ€

SIMPLE Disney World Planning Tips & Tricks; Park Bag

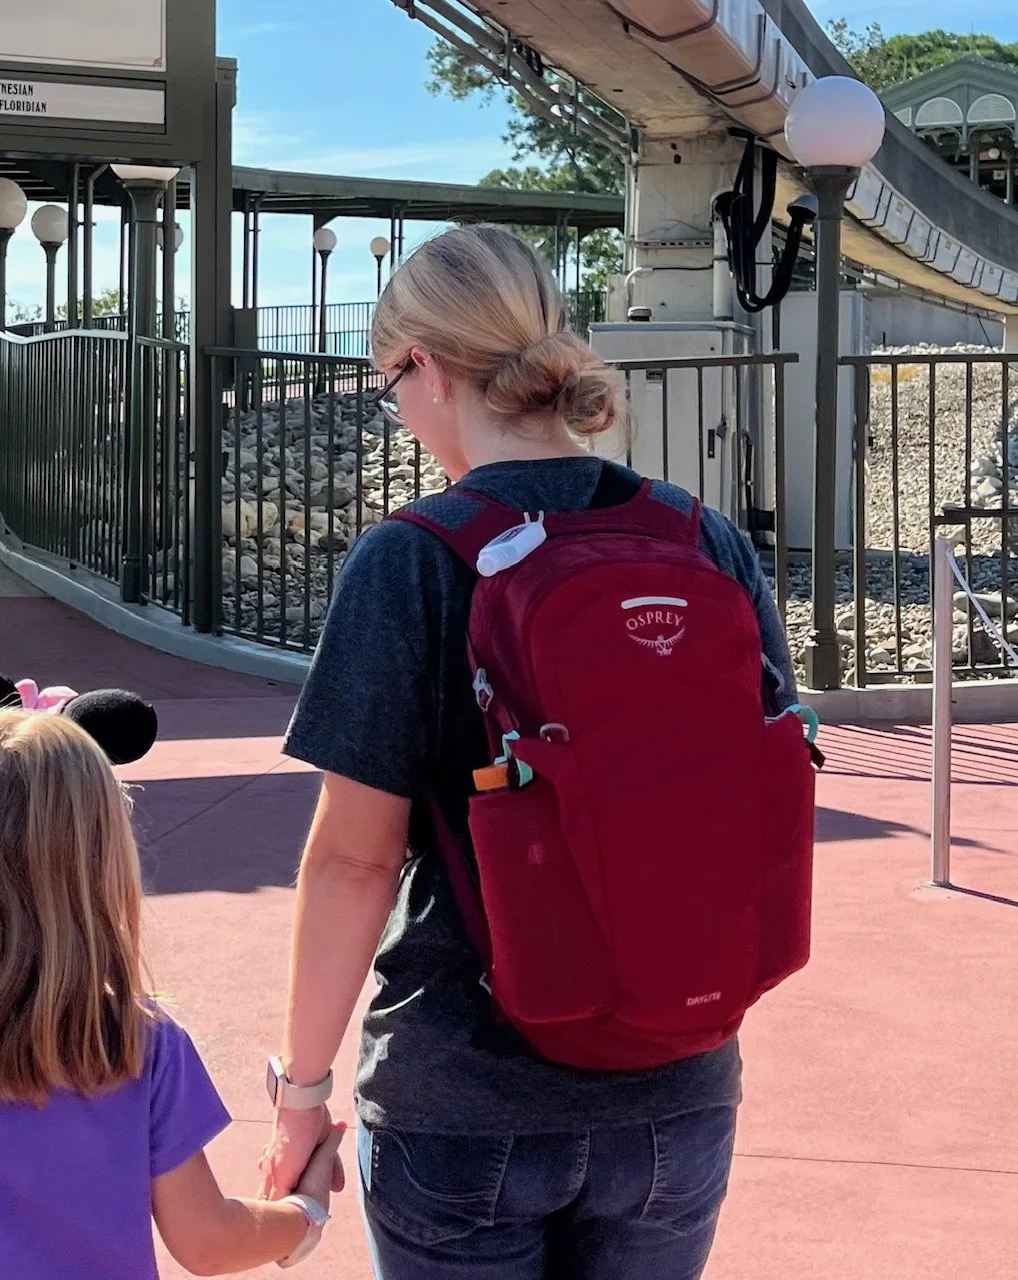
Having a small backpack to bring around in the parks is a must. Cute Loungefly bags are very popular at Disney, but I personally donโ€™t think theyโ€™re very practical. For us we found the Osprey Daylite pack to fit the bill perfectly - it was big enough to carry snacks, disposable ponchos, our refillable Nalgene water bottles, cooling towels, and still have enough room to fit small souvenirs or some thin sweatshirts. Itโ€™s also small enough to be able to bring on most of the rides - including roller coasters. Also the Osprey Daylite carries the weight SO well - even full of souvenirs and two full Nalgene water bottles you barely know it's there. An amazing added feature is you can use the cinch buckles on the sides to thread through the Nalgene water bottle loops to keep them extra secure. My husband carried the bag most of the time but we all took turns with it occasionally.

SIMPLE Disney World Planning Tips & Tricks; Lululemon Belt Bag

I also carried a Lululemon Belt Bag on me at all times that was perfect for carrying my phone, wallet, anti-friction balm (to help prevent blisters), and hand sanitizer.

(PS - if you're looking for a fun but simple Disney-themed bag, Lululemon also has this really cute Mickey Outline Belt Bag that I totally would have worn!)

And donโ€™t forget to make sure your Park Bag is packed and ready each night to make the mornings quicker and easier - especially if youโ€™re Rope Dropping!

AirTag Your Kids & Strollers

You may want to consider AirTagging your kids, especially if youโ€™re concerned about the possibility of getting separated from them in the airport or parks. We used bracelets to hold our kidsโ€™ AirTags (they wore an AirTag on one wrist and their Magic Band on the other). It was also super helpful in finding each other when we did split upโ€ฆ sometimes I would take one kid to the bathroom or to get food at one food stall, and my husband would take our other kid in the opposite direction to a different food stall. By using the AirTags we could easily find each other to meet back up afterwards.

If you have a stroller (we did not), itโ€™s highly recommended to AirTag them. Cast Members constantly shuffle and move strollers around in stroller parking areas to make room for more strollers, a parade coming through, etc. And while itโ€™s unlikely, rarely strollers do get stolen tooโ€ฆ so definitely AirTag them to keep track.

Park Gift Shop Tip

When you're in Gift Shops in the Parks always check if the item youโ€™re interested in is available elsewhere - like The Disney Store Online or Target. Unfortunately most items in the Park Gift Shops are โ€œPark Exclusivesโ€ and unable to get elsewhere, but at least several of the things we looked at were available other places - sometimes slightly cheaper too. And even if itโ€™s the same price online, if youโ€™re able to buy it from home it will save you that much more room in your luggage ;)

Be Kind to your Feet

You will walk a lot in Disney - a LOT. We averaged close to 10 miles a day!

Thankfully weโ€™re in pretty good shape, our kids are big enough to walk and keep up, and we all wore good footwear - so we had no issues. That being said, make sure youโ€™re prepared for the amount of walking you will do. If you need to, start taking progressively longer walks weeks or months in advance to help train up for it. Definitely pack a comfortable pair of broken in sneakers as your main walking shoes, plus another comfortable pair of shoes as a back up in case your sneakers get wet or your feet need a break from your regular shoes one day. Many people recommend โ€œcrocs with socksโ€ though I brought Oofos - but please pack whatever suits you best. Other things that you may want to consider packing are anti-friction balm, blister bandages, compression socks if needed, and epsom salt lotion (it feels so nice after a long day on your feet!).

Paying Extra for Lightning Lanes (LL) is Worth It

Initially I was totally against Lightning Lanes (LL)โ€ฆ Me: โ€œNo way are we paying extra money towards rides.. this trip is expensive enough!โ€. However, my husband insisted we get them and Iโ€™m so glad he did because without them there was no way we could have fit in half of what we did otherwise. With LL we luckily were able to fit in EVERYTHING we wanted to do and more. We found the trick to be to schedule your first Lightning Lane Multi Pass (LLMP) as early as possible in the day (even if itโ€™s on a โ€œthrow awayโ€ ride that usually doesnโ€™t have a long line) and then keep stacking and modifying your selections as you check into rides.. you can have a total of 3 rides booked ahead at a time with LLMP. Sometimes it kept us running from one side of the park to the other because we had to work around what was available and when, but we were able to fit SO much more in.

We also booked Lightning Lane Single Pass (LLSP) for the new/popular rides those were available for, like TRON and Guardians of the Galaxy Cosmic Rewind. With all LLs you check into the LL line at your scheduled time and youโ€™re able to get right on the ride with no wait or a very short waitโ€ฆ on the other hand we saw regular wait times for rides typically range from anywhere from 5 minutes to 240 minutes (thatโ€™s FOUR HOURS!), with the average being probably between 20-55 minutesโ€ฆ still thatโ€™s a long time to wait in line, especially if most rides have a wait like that you would end up spending most of your day standing in line. Also, I donโ€™t think our kids would have had as much fun or as much patience if we were in lines all day, every day of our trip.

Use Apple Watches Instead of Magic Bands for Adults

If you already have an Apple Watch you can link your tickets to your watch and use that to scan in at the gate for park entry, Lightning Lanes, and for PhotoPass pictures and skip buying a Magic Band. The one thing it canโ€™t do is unlock your hotel room doorโ€ฆ which we learned the hard way one night when we locked ourselves out of our room after using the pool. Oops. (Don't worry though - you can get a key card to keep in your wallet for the door.)

Get a โ€œSecurity Bandโ€ if You Use Magic Bands (for Kids and Adults)

SIMPLE Disney World Planning Tips & Tricks; Security Bands for Magic Bands

It is possible to do Disney without Magic Bands (you can get key cards at your hotel that can be used for ticketing, Lightning Lanes, hotel key, etc), but having everyone in your party either have a Magic Band or an equivalent (like a linked Apple Watch) will make everything go a lot smoother and quicker - especially at park entry and Lightning Lanes. For those with Magic Bands, using a "security band" like these on them is a MUST. Magic Bands just do not stay on well at all, and if you donโ€™t want to loose it on your trip you must secure it and these worked perfectly for us!
(My husband and I even added the security bands to our Apple Watches for extra peace of mind.)

Donโ€™t Stress About Dinner Reservations

Unless youโ€™ve got your heart set on dining at a very specific, hard-to-get restaurant (like Ohanaโ€™s, Tusker House, or Cinderellaโ€™s Royal Table), donโ€™t stress about making reservations early. For us we waited and made reservations at several sit-down restaurants (including Character Meals) about a week before we went and had no problems making reservations for the days we wanted, though the time choices were somewhat limited. However, once it was the day-of we were able to modify the reservations and choose from lots of time slots to better suit how our day was going (either move the reservation up earlier or back later).
**Definitely check ahead of time though what the cancellation/modification policy is of the restaurant youโ€™re eating at because some will not let you change it within a certain amount of time of the current reservation without a fee.

Buy Silhouette Frames When You Get Home and Save the Space in Your Suitcase

My single must-do/must-have souvenir from Disney was getting Silhouette Portraits done of our kids in Magic Kingdom. It was such a cool experience watching them work and cut a perfect likeness within minutes! I recommend getting them done mid-day if possible, as the line seems to be shorter. After the silhouettes are cut and it's time to pay you have the option to buy the frames there if you would like. I had every intention of buying oval frames there but at the time they were sold out of ovals and only had rectangular frames which I just wasn't interested in. So we got our silhouettes to-go in a little gift bag (tip: it would be a good idea to bring a large ziplock bag to protect the silhouettes a little more).

SIMPLE Disney World Planning Tips & Tricks; Silhouette Portrait Frames

When it came time to pack up and go home at the end of the week I was actually very thankful we didn't buy the frames in Disney - we travel with carry-ons only which were already stuffed to the brim with our regular items and all our other souvenirs. There would have been no room for frames.

Once we got home I shopped around online to find oval frames that fit the silhouettes. After reading a lot of mixed reviews I ordered several different frames to find the one that fit best. After some trial and error I found the PERFECT FIT oval frames for the Disney World Silhouettes right on Amazon - and they come as a set of two! It was meant to be ;)

Do Early Entry and Rope Drop the 2nd Most Popular Ride

By staying on-property we were able to do Early Entry at the parks - this is when guests staying at Disney resorts are allowed in approximately 30 minutes earlier than normal entry. It doesnโ€™t sound like much of an edge, but itโ€™s a huge advantage - especially if you get in line at the gate early and youโ€™re among the first people in. Being in early lets you take photos and enjoy the scenery without as much crowds as later in the day - this is especially noticeable at Magic Kingdom.

You can also โ€œrope dropโ€ a ride this way - which means you get to the ride entrance before they โ€œdrop the ropeโ€ for that section of the park and start letting people queue up for the ride(s) in that section. (Keep in mind not all rides are available during early entry, but some will be open and some you can start lining up early for - you can check the list of whatโ€™s going to be available for Early Entry on the Disney website.) We found that the most popular rides were still crazy-busy and would quickly develop insanely long lines at rope drop, but the not-as popular rides would be walk-on. Therefore we we would make sure to schedule our LLs for the most popular rides and try to rope drop the second-most popular rides. For example, on the day we went to Animal Kingdom, Avatar Flight of Passage had an insanely long line at rope drop but Avatar Navโ€™i River Journey was walk-on - in fact we rode it twice in a row with no wait!

Eat One Meal a Day from Packed Food to Save Money

To help save money on food costs eating out in the parks, we typically ate breakfast in our hotel room before we left for the parks for the day. We had planned on doing that anyways to help save money, but since we would leave so early for Early Entry nothing was open yet for breakfast anyways so it ended up being a necessity. In our carry-on bags we had one backpack full of granola bars, breakfast tarts, dried fruit, etc. and it was perfect for a quick breakfast before heading to the buses or Skyliner to get to the parks.

Get Free Water in The Parks

Another way to save money is to bring refillable water bottles and ask for free water at any of the quick service food stalls. They will give you cups of ice water than you can pour in your refillable bottle (theyโ€™re not allowed to fill your bottles for you for sanitation reasons). There are also some water refill stations at places around the parks, theyโ€™re often near a bathroom but not all bathrooms have them.

A lot of people will complain about the taste of the water, but we didnโ€™t mind it. We did bring Gatorade packets just in case (for flavor and for hydration purposes), but I think we only used them once or twice.

You Can Get a Doctor โ€œHouse Callโ€ to Your Hotel Room, If Needed (Though I Hope You Wonโ€™t Need It)

During our trip our oldest daughter unfortunately had an awful cold (she had tested negative for Covid/Flu prior to leaving). One night it seemed to peak and we were questioning if it could have developed into pneumoniaโ€ฆ we wanted to get her checked ASAP but it was the middle of the night and the local Urgent Cares were closed and we had no transportation. I called the front desk and the hotel could have provided transportation to the local Emergency Room or they could connect me with a third party company that provides โ€œhouse callโ€ doctor visits in your hotel room.

We opted for doing a house call since it wasnโ€™t a true emergency and we wanted as little disruption as possible for our kids. The front desk connected me with the company and I provided patient information, her symptoms, and payment (they do not take insurance - you must pay up front but you can try to submit to your insurance later for reimbursement). Within an hour a doctor was knocking on the door - he was very nice, professional, and came with a large rolling bag with equipment in it. He took patient history then checked her nose, ears, throat, and eyes, listened to her lungs, and took her O2 reading, pulse, and temperature. Thankfully everything checked out fine - she did not have pneumonia, it was just the peak of her viral cold and she was all set.

When he left he provided us with a superbill that we could submit to our insurance to try to get reimbursed. Unfortunately for us he was not in network for our insurance which was a bummer so we were unable to get reimbursed (though a portion of the bill did go towards our out-of-network deductible so at least that was something). Nevertheless, it was well worth it for peace of mind and convenience - it was still cheaper than an ER visit and a lot less disruptive.

Most Importantly: Be Flexible and BE NICE

The most important tip of all, in my opinion? Be flexible (set low expectations) and be nice. Seriously.

If you go into your trip expecting nothing but magic and pixie dust and doing every single thing you want youโ€™re probably going to set yourself up for disappointment. Rides go down.. a lot. Character lines can be long and close for breaks. Your kids may be pooped out and want to go back to the hotel at 1PM. One reservation may take longer than expected and cause you to miss another reservation. So be willing to compromise, go with the flow, and be flexible. If you set low expectations on how much you will be able to do, you will automatically win when you exceed those (low) expectations.

And above all - be nice, please. For the most part all the guests we met were very nice but we also came across some doozys who were exceptionally rude to Cast Members or even their own kids. Please have patience with everyone and youโ€™ll have a much better time.


I hope these tips based on our experiences will help you! Definitely do your research and be flexible and Iโ€™m sure youโ€™ll have a wonderful trip!

Disclaimer: This post shares tips based on our experiences - please do your own research regarding what will work best for you and/or your family and realize that things may be subject to change.


KEEP UP WITH BIRCH LANDING HOME
|  Etsy  |  Facebook  |  Instagram  |  Pinterest  |  Bloglovin'  |  Hometalk  |

Preparing to Homeschool

We are still waiting to hear the final plans for our local school district (whether thatโ€™s in-person learning only, remote learning only, or a choice/combination between the two) - but whatever our school district decides, weโ€™ve already made our decision. Because of the unknowns regarding COVID and how things will play out this fall and winter, we have decided to keep our kids home either way. | This post contains affiliate links |

Preparing to Homeschool

We are waiting to hear what our district offers before we purchase a curriculumโ€ฆ if they offer remote learning then we will likely do that and supplement on our own with what we feel our kids need more help with or are interested in learning more about. But if they donโ€™t offer remote learning then we will choose a curriculum and officially homeschool.

I recommend looking into what your state requires regarding homeschooling as every state is different. In New Hampshire we have a lot of flexibility and pretty basic requirementsโ€ฆ I find this to be a blessing and curse - itโ€™s great because itโ€™s very open-endedโ€ฆ but it also makes it very difficult to choose what to do because, well - itโ€™s very open-ended. Right now Iโ€™m in the process of looking into different curriculums (in fact Iโ€™m attending an โ€œe-open houseโ€ online tomorrow for our 1st grader). A family member also offered to loan us some of their homeschool books from a few years ago which is very helpful. But since our kids are only going to be entering 1st grade and preschool Iโ€™m not too stressed about choosing the right curriculum for themโ€ฆ what they need to learn is very basic and could be taught on our own if needed without following a specific curriculum (which could be okay in our situation). Regardless, I have more homework to do in the coming weeks to decide how weโ€™re going to handle everything.

Preparing to Homeschool

In the meantime though, I thought it would be a good idea to start setting up our homeschool area in our home. Ideally I would love to get our 1st grader her own desk and designated school space but we just donโ€™t have the room. Instead we worked with what we had and decided to dedicate one corner of our dining room to be our homeschool area.

Preparing to Homeschool

We already had a chalkboard easel (similar one linked here), and decided to repurpose a small metal utility cart we already had as a shelving unit for our homeschool supplies. You could also use a 3-tier rolling cart for the same purpose.

Preparing to Homeschool

The cart will hold most of our supplies for homeschooling. On the top shelf we have play money, sight word cards, and some basic art supplies.
On the middle shelf we have a collection of workbooks for both kids as well as their Kids Kindle Fires. We love the Kindles for playing age-appropriate educational games for each kid, and reading books for our first grader.
On the bottom shelf we have a small collection of reference books for kids, some early reader books, and a small globe. I lined the bottom of this shelf with a wooden board so the books would stand up easier.

Preparing to Homeschool

We absolutely love the "First Big Book of.." series from National Geographic (Space is linked here). They have many in the series and our kids could spend all day looking through them.

Preparing to Homeschool

FIRST GRADER | Again, we still haven't picked a curriculum yet - but here are some supplemental workbooks we've gotten for our 1st grader so far: Cursive Handwriting (this isn't something that is typcially taught in first grade here but our daughter has expressed an interest in learning, so this is more of a fun bonus activity we plan on working on if she feels like it), Brain Quest Workbook: Grade 1 (we love this series of workbooks for fun, educational worksheets that cover a variety of subjects), Logic Puzzles for Clever Kids (age-appropriate logic puzzles are great for everyone to practice thinking and problem solving skills), and Human Body Activity Book for Kids (we chose this to cover some science and health basics).

Preparing to Homeschool

For our First Grader we also ordered this set of play money. Getting kids familiar with money is so important on many levels - not only will they need to learn our currency and what everything is called and what it's worth, money is also great for teaching math concepts of addition, subtraction, and equivalences.

Preparing to Homeschool

PRESCHOOL | For our preschooler, we're keeping it VERY basic. At this age I think it's best to mostly learn through playing, but we're going to work on reinforcing and learning some very basic things like letters, numbers, colors, and how to write her name. For her I purchased "My First School Book" from Learning Without Tears, which came very highly recommended to me. I also got a Melissa & Doug Water Wow ABC Book as a fun reusable resource to reinforce her ABCs.

Preparing to Homeschool

A computer is also SUPER important in most remote learning/homeschooling situations these days... I upgraded my Macbook last year so our daughter has been using my old Macbook for school but a basic Chromebook is a great option for most. It's also a very good idea to have a printer available to print out worksheets and activities that can't be done online.

You also may want to consider some "school decor" to help set the stage for them to help it feel more like school. A calendar center might be a good idea for younger grades, or some laminated maps. I picked up some maps for us that I will hang up soon - our daughter has been really interested in maps and learning about the world and I personally think it's important to teach them about the bigger world out there, especially since we're so closed off at home these coming months.

Not pictured is our Art Cart which we keep in our pantry - it's well stocked with art supplies, pencils, crayons, glue, rulers, coloring books, paper, and just about anything they might need for hands-on activities or creativity.

We still have a lot to figure out but now that we have our classroom space starting to shape up I feel like we're heading in the right direction. Whatever you decide for the coming school year, know youโ€™re not alone - itโ€™s definitely a difficult and stressful decision no matter what you choose. Best of luck and stay healthy!


KEEP UP WITH BIRCH LANDING HOME
|  Etsy  |  Facebook  |  Instagram  |  Pinterest  |  Bloglovin'  |  Hometalk  |

Comment
Share

Creating and Maintaining a Monthly Budget {Free Excel Spreadsheet}

With baby #2 coming, we've been more mindful than ever about where our money is going and working hard to stay on-budget.  By closely keeping track of everything we're getting a better idea on where everything is going and where we can shave off a few dollars.  With only one income and a lot of expenses (both expected and unexpected) it can make it very challenging to stay on-budget each month.   | This post contains affiliate links. |

Creating and Maintaining a Monthly Budget - FREE Customizable Excel Spreadsheet

Here I've shared a more simplified version of the spreadsheet we use (since we're self-employed we also need to set aside money for quarterly taxes and other expenses).  You can change the Expense titles in the left hand column to fit your needs, but I've tried to include all the basic expenses that most young adults will have.  

Next replace the monthly Income in the example with your own monthly income (I had to put in a number here as an example so the formulas wouldn't result in error).  Then go down the Budget column and fill in what you expect or budget your bills to be.  As your bills come in, put in these figures in the Actual Spent column.  All of the percentages and totals will auto-update as you fill in the chart.  

Over the course of the next few months, you'll see how your expectations (Budget) line up with reality (Actual Spent) and will be able to identify trends.  Maybe you spend more for Gas than you thought you did.. or maybe you realize that you spend too much on Entertainment and should put some of that towards other bills...?  Keeping track of where everything is going is very eye-opening and will help you stay ahead.  The most important thing is writing everything down and sticking to it!  

In the event the doing an Excel spreadsheet isn't your thing, there are also many great paper-based Budget Planners/Trackers you can buy out there! I haven't used it myself (yet), but I have heard great things in particular about this highly rated Budget Planner Notebook.


KEEP UP WITH BIRCH LANDING HOME
|  Etsy  |  Facebook  |  Instagram  |  Pinterest  |  Bloglovin'  |  Hometalk  |

Comment
Share

Easy Ways We Saved Thousands on Our Dream Wedding

My husband and I have been married for nearly five years now but it seems like our wedding was just yesterday.  We got married before Pinterest was a thing and so it was up to us to figure out all the details on our own.  It was a learning process and we came up with some great ways to cut costs and still have our dream wedding.  | This post contains affiliate links |

How we saved BIG on our Dream Wedding!

From the start we knew exactly where we wanted to get married - a beautiful historic mansion overlooking the lakes and mountains we love (it was also where my husband proposed).  So that helped narrow things down quite a bit.  But the downside?  It was expensive and didn't include much of anything.  In order to have our wedding where we wanted, we had to cut costs in other parts of the budget and in doing so we saved thousands of dollars.  

Tips for Saving Big on Your Dream Wedding

Start planning as early as you can.  We started planning our wedding about 13 months out; we thought we had plenty of time but we were shocked at how many dates were already taken at our venue of choice, how many DJs/photographers were already booked, etc - even more than a year out.  Starting early means you have the most options to choose from and are more likely to find affordable vendors that you like.  Waiting until the last minute can leave you stuck with expensive options or ones you aren't happy with.  

All photos by Steve Holmes Photography

All photos by Steve Holmes Photography

Find a venue that includes a lot.  Okay, so this tip did not really apply to us (our venue included little other than the physical ceremony location, reception hall, and a day-of wedding coordinator).  But many venues include at least something, and some include a lot more than others.  Some items that may be included in the venue cost include:  the wedding cake, toasting champagne, linens, DJ, flowers, cake cutting fee, bar credit, coffee service, hors devours, or even all of the food/catering.  If you can find a nice venue that includes at least some of these items, it can save you big in the long run.  

Pick a venue that's beautiful in itself.  If you can find a venue that looks pretty as-is, you don't have spend a lot (or anything) on decor costs!  An outdoor wedding with a pretty view means you don't need anything for the ceremony.  And a pretty looking old hall with a lot of character means you can get away with little or no decorating for the reception.  We spent almost nothing on decor costs since we felt our ceremony location was so beautiful already. 

Fairytale balcony kiss on our wedding day.

Use details of the wedding venue to your advantage.  One of the little touches that people remembered most about our wedding?  The wishing fountain!  Our venue had a beautiful fountain in the middle of the ceremony location and we decided to use this feature as part of our day.  We put out a jar of brand new shiny pennies dated our wedding year (which cost $2 - literally), and put a little note in our wedding program about throwing pennies in the fountain for happy wishes for the bride and groom.  

Happy wishes for the bride and groom!  A cute way to incorporate details of the venue into the wedding day.
How to save big money on your dream wedding.

Don't get married on the weekend.  I know this sounds strange but many locations offer a great discount if you get married on any day other than a Saturday or a Sunday (and some locations offer off-season discounts as well if you get married in the winter).  The date we really wanted for our wedding had already been booked (even though it was over a year out!), and so when were deciding on a new date we chose to have our wedding on a Friday evening.  By having it on a Friday we saved around $750 just on the venue cost!  

Opt for the buffet.  When selecting a caterer (presuming it's not included with your venue), look for ones that also offer a buffet option and compare that price to their "plated meal" price.  Buffets generally cost about 1/3 less than having the meal plated and served to your guests.  We choose the buffet option for our wedding and saved a lot on meal costs!  

Opt for the buffet rather than a plated meal to save as much as 1/3 on wedding catering costs.

Make your own invitations - or at the very least assemble them.  Originally we wanted to design, print, cut, and assemble our invitations ourselves.  But with all the time and stress going into wedding planning on top of regular work, we decided to forgo the stress of designing and sourcing paper/printing services and order our invitations.  We found a beautiful invitation design that fit our theme and colors perfectly and it was all printed on thick, gorgeous paper.  The best part?  It was from a small designer/paper goods company that was priced really reasonably and also had the option of sending all your invitation materials uncut and unassembled for $150 less which was a great savings.  

Don't get sucked into buying "wedding-specific" items.  Next time you're at a bridal shop or craft store, check out wedding day items like guest books and flower girl baskets and you'll be in for some sticker-shock.  I still remember looking at a flower girl basket and not believing it cost over $25!  Because of that we decided to for-go the (ugly in my opinion) while silk flower girl basket and get a basic woven basket at a craft store for $5 and tied a piece of coordinating ribbon to the handle.  We also skipped the traditional guest book and had guests sign the photo mat of one of our favorite engagement pictures - this keepsake is now hanging in our master where we can see and appreciate it every day.  These days with Pinterest the alternative guest book ideas are endless!

A signed photo mat is a great alternative to a guest book.

Borrow your petticoat.  If your wedding dress calls for a petticoat, see if any of your friends or family has one you could borrow for your wedding.  (If they do, make sure to try it on with your dress before your dress is altered to make sure it will work.)  No one sees the petticoat and it's not a sentimental part of the day, so there's no need to actually buy one.  

Dream wedding flowers - save money by having someone pick them up.

Offer to do the leg work.  If you're working with a vendor and have some extra (and very reliable!) hands willing to help on the day of the wedding, offer to do the leg work for the vendors - in exchange for a discounted rate of course.  For example, the cost of our linen rental included delivery and pick-up of the linens but my husband's parents offered to take care of it since they lived nearby.  By having them pick up the linens the day before the wedding, and then drop them back off the day after the wedding it saved us $100.  Also, our florist was about half a mile from the hair dresser where we all were getting our hair done - so, rather than pay the delivery fee for our bouquets my mother-in-law ran over and picked them up for us.  

Take advantage of family and friends' talents.  If you know someone that has a great talent or hobby, feel them out to see if they'd be willing to help you with an aspect of your wedding.  My sister-in-law is super-crafty and an AMAZING baker.  She made our gorgeous custom wedding cake for us and my brother-in-law made the cake base, saving us hundreds of dollars - not to mention it's much more meaningful knowing it's made with love by someone we know.  

Gorgeous rustic custom wedding cake by The Little Snowflake

Willow Tree Cake Topper (Affiliate Link)

DIY your own wedding centerpieces to save big!  These are made with birch logs and candles.

DIY wedding centerpieces.  If you choose flowers for your centerpieces each arrangement can easily cost $80+ and that adds up to a lot, fast.  We decided to make our centerpieces ourselves and save this money.  My husband and I opted for flower-free centerpieces that we could make way ahead of time; we used birch logs with hearts and table numbers carved into them (a nod to when we carved our initials into a tree while dating), along with river rocks and some other natural elements.  Everything we choose for our centerpieces meant something to us which made our them very personal.  In order to make them we only had to purchase the candles and some river rocks - for all 10 centerpieces it cost us about $35.  
(My only other piece of advice for making your own centerpieces would be to bring it to your venue and see it on one of their tables ahead of time, if possible.  Our centerpieces looked awesome on our kitchen table and we thought they were the perfect size, but once they were set up at the venue we realized they didn't fill in the center of the tables quite enough and we should have brought some smaller elements to fill in around it.)  


Simplify the bouquet.  Florists charge more for having to source out more flowers.. if you have mixed bouquets they can cost a lot more than a bouquet the same size that contains just one type of flower.  We wanted to keep it simple anyways and decided to stick with straight yellow roses for all the bouquets and that saved us a lot of money in itself.  

A rustic hall for the wedding reception doesn't require a lot of decoration.

Borrow a fun car instead of renting a limo.  We had the advantage of having our ceremony and reception at the same location, so we didn't need to transport the wedding party from one place to another.  Even still, we wanted a fun "getaway" car to leave in at the end of the night.  Luckily for us, our family is into restoring cars as a hobby and we got to use a '66 Chevelle that we all helped fix up - definitely made it more fun and more meaningful than using a limo service.  

Borrow a fun car rather than renting a limo - save money and have more fun!

The One Thing Worth Splurging On

A great photographer.  Seriously folks, hire a great photographer and you won't regret it!!  Your wedding photos will be what you look back on to remember the details of your day, and it's so important to have ones you're proud of and that truly capture all the magic.  A great photographer can also do wonders with what they have - even if you don't have the most ideal backdrop for a photo they can make it look amazing with some artful focus or composition.  

A great candid shot of riding the trolley to the wedding reception.

When hiring a photographer make sure to look at their full portfolio; see if you like their style, if they're consistent with editing techniques, if the overall mood of the photos fits your personal taste.  It's also a good idea to hire a photographer that comes with an assistant photographer - this way you get double the photos and more angles of the ceremony.  It also allows the photographers to be in two places at once, especially helpful for taking getting-ready photos.  

You also want to find a photographer that gives you full rights to your photos - after all you want to be able to print as many copies as you like, make photobooks, send photos to your local newspaper for your announcement, post them on Facebook and other social media, or even possibly submit them to be featured in bridal magazines.  Without a letter stating you have full ownership and publishing rights to your photos you'd be unable to do any of that without going through your photographer every time (and doing so would cost you extra money each time).  

And don't forget to quiz any potential photographer on things that may go awry and how they'd handle it... just in case.  A personal emergency came up and they were unable to photograph your wedding at the last minute?  (They should have some photographer associates of equal or better caliber they can call on to fill in for them at no additional cost to you)  If a camera or lens gets dropped on the big day?  (They should have backup equipment with them as well as extra fully-charged batteries).  A great, experienced photographer should have a game plan for anything that may come up and still get you beautiful photos of the day despite any challenges that may arise.  

Photos from our wedding were featured on New Hampshire Bride Magazine's website, Maggie Sottero's website, in Super Chevy Magazine, and on Love & Lobster.

How to Save Thousands of Dollars on your Dream Wedding

All photos by Steve Holmes Photography

Disclaimer:  Please note this post shares my opinion and prices and information mentioned are based on our experience of planning our wedding five years ago.  *Prices and packages from vendors that we used may have changed.*  

KEEP UP WITH BIRCH LANDING HOME
|  Etsy  |  Facebook  |  Instagram  |  Pinterest  |  Bloglovin'  |  Hometalk  |

Reusable Weekly Planner - Plan your week, meals, and goals! {Free Printable}

For a while now I've been striving to get better about meal planning, so a few months ago I designed this weekly planner to keep in our kitchen and see if it helped.  After using this method for several months I'm happy to report that it has been a HUGE success and wanted to share it with all of you who may have staying organized, planning meals ahead of time, or reducing your grocery bill as goals for 2016!  

Reusable Weekly Planner Free Printable - to-do list, menu and meal planning, weekly goals

This weekly planner can either be printed and written on directly - or you can print, frame it, and simply write on the glass to keep reusing it (which is what I have done).  I love having it under glass because it means it's always on display and easy to refer to, and it saves a lot of paper and ink.  I didn't include too many photos of it it in our kitchen because it was so hard to photograph.. the glare from the glass makes a decent photograph nearly impossible.  

Reusable Weekly Planner in the kitchen
Pro-tip:  Write on the glass with a Sharpie to avoid smudges, then erase with a little 91% rubbing alcohol.  

Pro-tip:  Write on the glass with a Sharpie to avoid smudges, then erase with a little 91% rubbing alcohol.  

To write on the glass, you can use a fine-tip dry erase marker or a Sharpie marker.  I prefer the Sharpie because it writes cleaner and won't smudge.  

"But how to erase it!" you ask?  

No problem at all:  simply put a little 91% rubbing alcohol on a paper towel and it wipes off with no problem and no residue.  

Example

Example

Every Sunday I sit down and first fill in all the daily "to-dos" for the week.  These are things that have to happen that day, like appointments.  This gives me a sense of what the week will look like and how much time I may have to cook dinner that day, etc.  Days we won't be home means I don't have to cook (wahoo!).  Because I lay it all out ahead of time I can plan ahead for groceries... leftover potatoes from Monday can be thrown into Tuesday's chili.  The chicken I buy can be portioned out for dinner on Thursday and Friday.  Planning ahead means less waste and saving money in the long run (and you know how hard I try to save money on groceries).  

"Goals for the week" is where you put in projects and goals you can pick at over the course of the week when you get spare moments.  I feel like this list makes me more motivated (and accountable) to be productive when I have down time.  

Reusable Weekly Planner

{Download free PDF of our Reusable Weekly Planner HERE}

Reusable Weekly Planner Free Printable - to do list, menu planning, weekly goals

So that's my Reusable Weekly Planner!  It's been a huge help to keep me more organized, more motivated, and save more money on groceries.  I hope that it will be as helpful for you!  

KEEP UP WITH BIRCH LANDING HOME
|  Etsy  |  Facebook  |  Instagram  |  Pinterest  |  Bloglovin'  |  Hometalk  |

Comment
Share